

Sunday, 1 May 2011
dashboard finished
Just pulled my first dash from the mould i made, its not perfect by any means but it will be okay after an hours worth of polishing. I think some dust must have got into the mould which has resulted in little indentations on the finished dash. Il probably do some more work to the mould and then make another


Saturday, 30 April 2011


Sunday, 20 March 2011
Update
Having not updated the blog for ages i thought id better get of by backside and write something!
The steering column is complete, all cowells are now fitted. The rollbar has also been made up and is in position.
Engine choice has now changed. Im now using a honda cbr1100 powerplant, but more on that later.


The steering column is complete, all cowells are now fitted. The rollbar has also been made up and is in position.
Engine choice has now changed. Im now using a honda cbr1100 powerplant, but more on that later.


Saturday, 29 January 2011
Mondeo steering column
a bit of progress today,
I mocked and tacked the hanging bracket that will also form half of the shroud around the column( this is currently 1.5mm sheet but once ive got the dimensions correct il make one from 3mm plate cos its abit spongy). Iv decided to take the column over the top rail rather than through the bulkhead because it would be impossible to fit without cutting TR9. It would also make the steering wheel hight rediculous. This will mean losing some bulkhead space but the shroud will have a bit of space for attaching the fusebox. Iv addded a 25mm box tube between tr8 and tr9 to which a fixed flexible bearing is attached to plates welded onto this tube.


below is the other side of the shroud, im going to cut out around the column so that it buts up to the other bracket and sort of forms part of the bulkhead.

When i fitted the sierra column i was very worried about clearance between the lower column and U2. Moving the column over TR8 has solved this problem, but until fitted, i dont know by how much.
I mocked and tacked the hanging bracket that will also form half of the shroud around the column( this is currently 1.5mm sheet but once ive got the dimensions correct il make one from 3mm plate cos its abit spongy). Iv decided to take the column over the top rail rather than through the bulkhead because it would be impossible to fit without cutting TR9. It would also make the steering wheel hight rediculous. This will mean losing some bulkhead space but the shroud will have a bit of space for attaching the fusebox. Iv addded a 25mm box tube between tr8 and tr9 to which a fixed flexible bearing is attached to plates welded onto this tube.
below is the other side of the shroud, im going to cut out around the column so that it buts up to the other bracket and sort of forms part of the bulkhead.
When i fitted the sierra column i was very worried about clearance between the lower column and U2. Moving the column over TR8 has solved this problem, but until fitted, i dont know by how much.
Saturday, 15 January 2011
Fuel tank all finished....
Today i finshed the fuel tank for the roadster. It measures 500mm x 200mm x 200mm, meaning it will hold 20 litres. I dont really need a large capacity as the car is going to be used mainly for short blasts. The tank is made from 1mm mild steel sheet. Incorperated into the tank are three foam baffles, a 10mm pickup pipe on the bottom ( which will be fitted with an isolation valve) and a 10mm return pipe on the top. the filler neck will be trimmed down to the correct length when fitted to the car, then an aero style filler cap will be attached and fitted flush to the rear body work. I tested the tank for leaks by blocking up the inlet/ outlet pipes and wieghing it down under water in a bath. The tank was watched carefuly for bubbles and after an hour I took it out of the water to find it bone dry inside wth no signs of leaks.


Sunday, 9 January 2011
just a bit of pottering about
Only had a couple of hours build time today so i made a thick steelm plate to for the drivers side footwell. This plate is to protect the drivers feet from a possible bellhousing/clutch failure. I also fitted the mushrooms to the front uprights and made a passenger side interior gear tunnel pannel....


Monday, 3 January 2011
All back together....
The build is now going back together after finishing and painting the chassis. Over the last few days iv welded in the engine mount plates. Rather than using the book spec mouts ive decided to gusset the two front chassis rails on each side to help rigidity with 6mm steel plate. This is at the expence of a few kilos, but a fair trade. All the suspension and steering components have been bolted back on, and are all torqed up to their final build state, just incase i forget something along the way.

 Today i built the seat subframes. I welded two 3mm steel straps to the chasssis and bolted two 25mm square box tubes accross them, to which i bolted the seats. For what seems like a simple job it didnt half have me scraching my head! The seats will need to come out over the next few days while i make some interior panels, but these wont be fitted until the engine and gearbox are in their final positions.
Im going to source a steering column this week, aswell as a couple of scrappy front wheels, this will allow me to roll the car about once the engine/ gearbox are in as its starting to get heavy.


Im going to source a steering column this week, aswell as a couple of scrappy front wheels, this will allow me to roll the car about once the engine/ gearbox are in as its starting to get heavy.
Friday, 31 December 2010
Update


Sunday, 12 December 2010
Floor, seat back panel and fuel tank
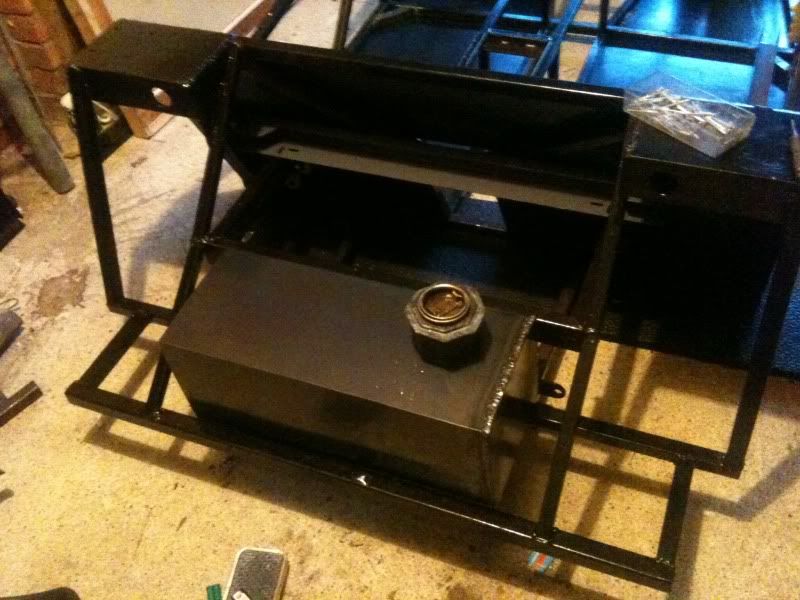
This morning, bright and early i stripped all the running gear, wishbones etc from the chassis and cut the floor panes from 1.6mm steel sheet. I decided to rivet every two inches and strip weld from above every 8 inches, just for peace of mind and also to add a bit of stiffness to the chassis. I also spent a good hour or so checking every weld aswell as re welding a few joints.

I then cut the seat back panel, also from 0.8mm steel (just to save a bit of money), i know it will add some weight but at least it will be strong. I wont rivet it in until everything else is back together.
I then started on the fuel tank. Ive made it 500 by 200 by 200, nice and compact but still 20 litres. Iv yet to put the baffles, end plate, outlet and filler neck on it. I filled it with water and left it for an hour or so and to my amazement there were no leaks so far!

I then cut the seat back panel, also from 0.8mm steel (just to save a bit of money), i know it will add some weight but at least it will be strong. I wont rivet it in until everything else is back together.
I then started on the fuel tank. Ive made it 500 by 200 by 200, nice and compact but still 20 litres. Iv yet to put the baffles, end plate, outlet and filler neck on it. I filled it with water and left it for an hour or so and to my amazement there were no leaks so far!
Saturday, 27 November 2010
Done a bit more today
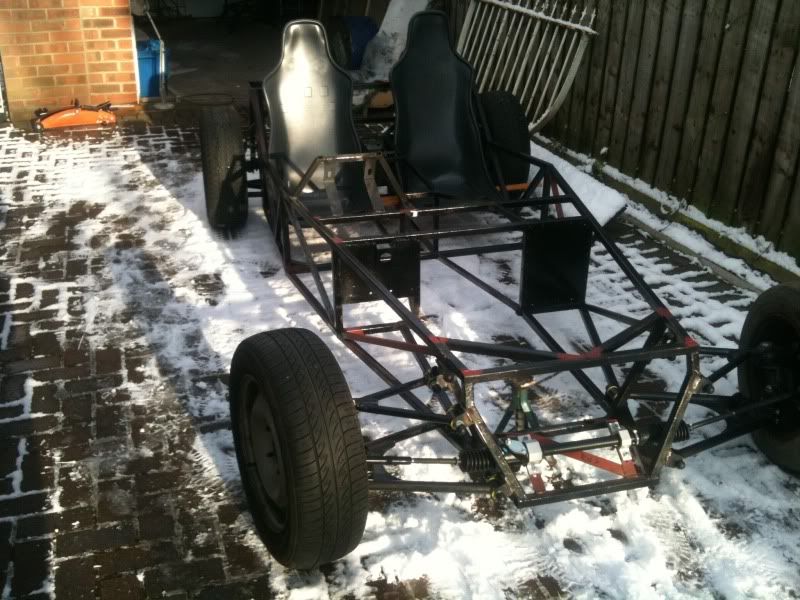
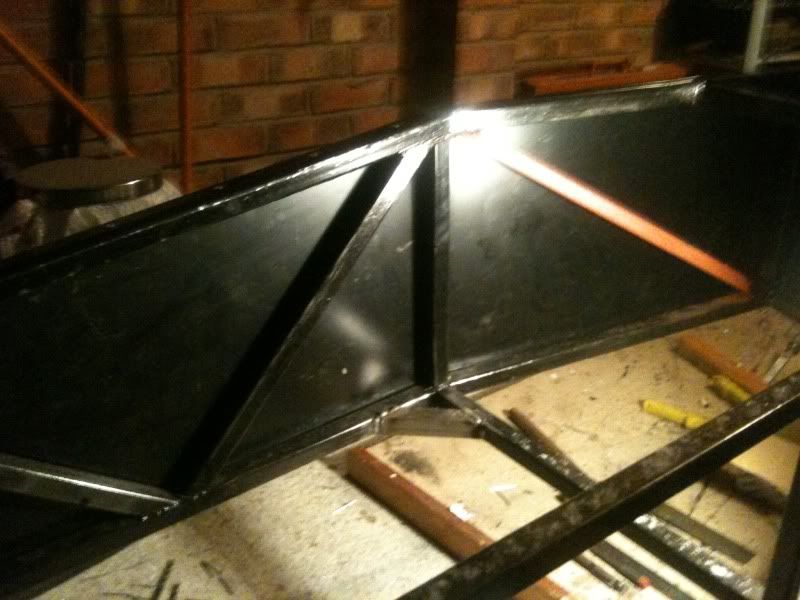
Well, i was intending to go down the local scrappy to get some bits and bobs, but four inches of snow stopped play. Luckily the garage is nice and warm so i pulled the car out and put some front wheels on it to make it easier to move.
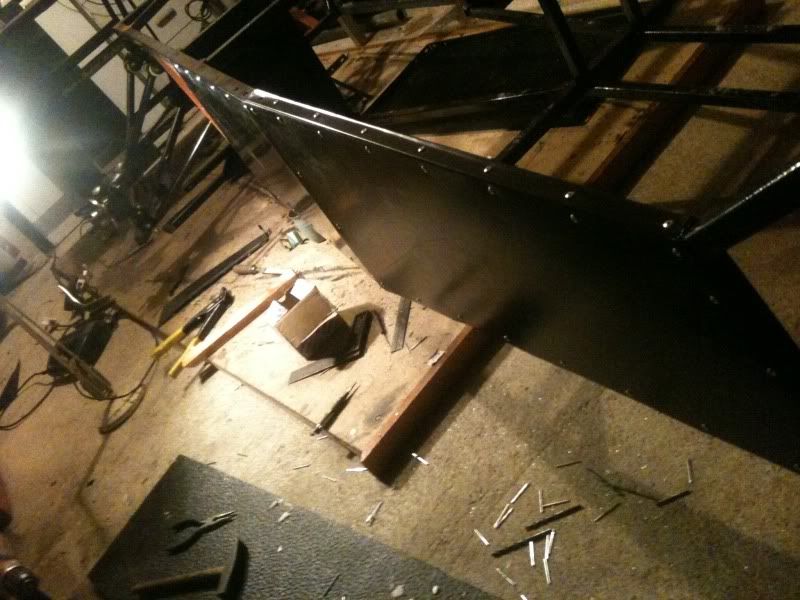
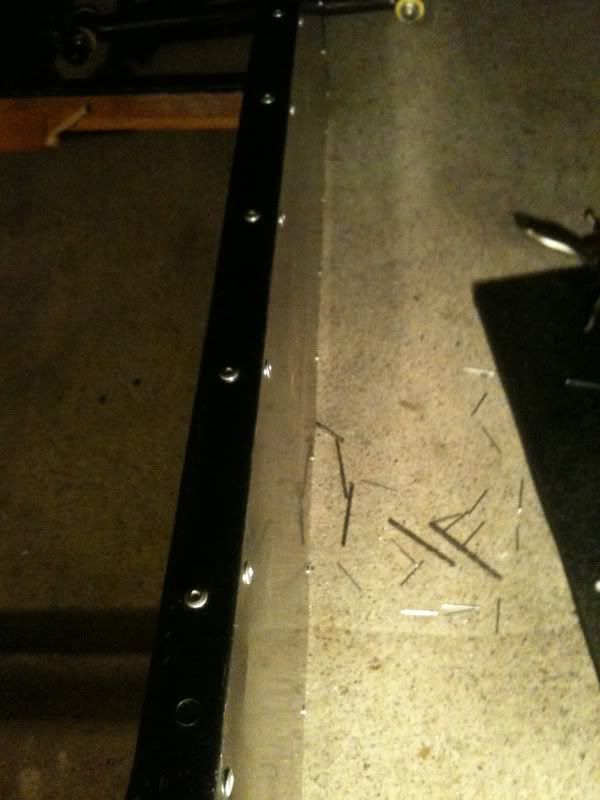
I spent the whole afternoon making the nearside side panel from 1.5mm anodised black ally sheet. Ive never worked with sheet metal before, but it turns out to be quite easy, although alot more time consuming than i thought. 102 rivets later, ive got one side panel and arms like Popeye!


I spent the whole afternoon making the nearside side panel from 1.5mm anodised black ally sheet. Ive never worked with sheet metal before, but it turns out to be quite easy, although alot more time consuming than i thought. 102 rivets later, ive got one side panel and arms like Popeye!
Thursday, 25 November 2010
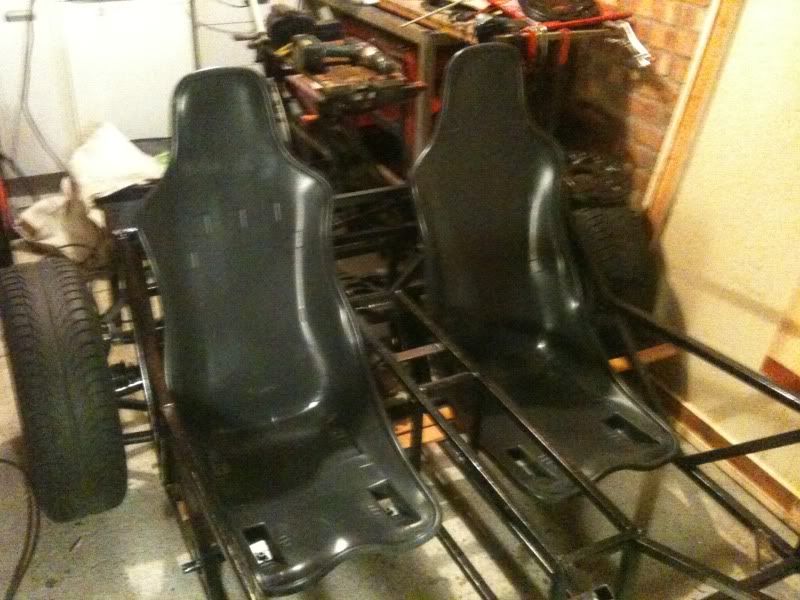
got some seats
Found a set of nice seats for the roadster, i Bought them on a whim, they were supposedly 46cm wide, the chassis floor space is 45cm wide. But, for £30 new on ebay i couldnt really go wrong. Luckily they just fit!

Tuesday, 23 November 2010
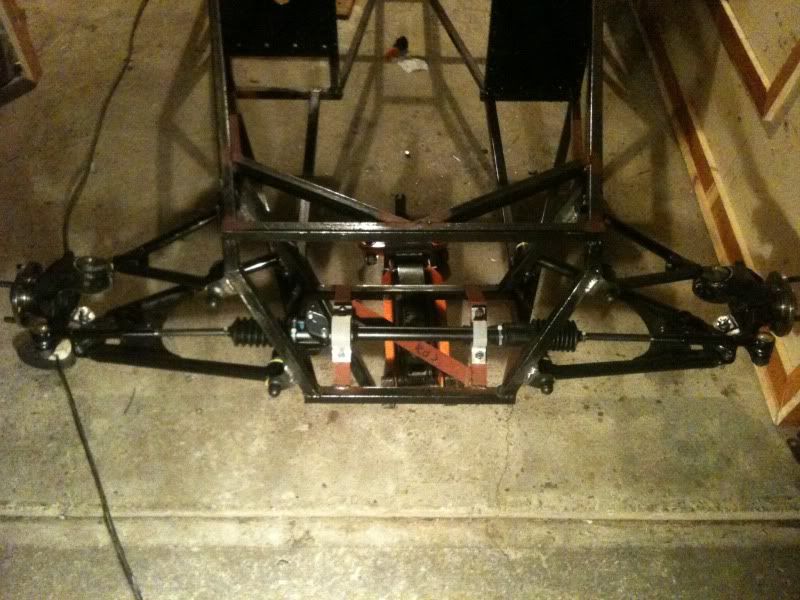
front end of chassis almost rolling
Got some more work done tonight.
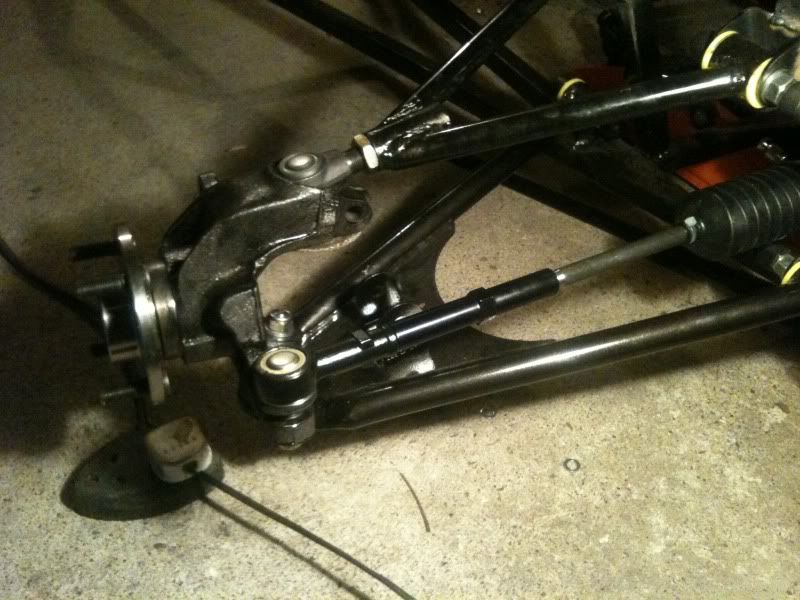
Picked up a brand new steering rack, rack extendion tubes, maxi ball joints, drag links, rs2000 track rod ends and some machined alloy clamps from saturn sports cars.
I had a quick play and mocked everything together loosly to check that everything fits with no issues.
All thats needed now to get the front end rolling on wheels is the mushrooms,which act as a dummy strut to take the top wishbone links. These have to be machined from alluminuim. Oh and shocks, although at this stage in the build, il make some dummies from left over box section.
I have also calculated the cost so far, £1099.58


Picked up a brand new steering rack, rack extendion tubes, maxi ball joints, drag links, rs2000 track rod ends and some machined alloy clamps from saturn sports cars.
I had a quick play and mocked everything together loosly to check that everything fits with no issues.
All thats needed now to get the front end rolling on wheels is the mushrooms,which act as a dummy strut to take the top wishbone links. These have to be machined from alluminuim. Oh and shocks, although at this stage in the build, il make some dummies from left over box section.
I have also calculated the cost so far, £1099.58
Another £800 or so and the chassis will be completly rolling, including steering column, some sexy willwood front brakes and nice alloys. Not bad when you cant even get a bare caterham chassis for that!
Almost forgot to mention. Last weekend i decided that i am going to go down the route of using a brand new zetec coupled with a reconditioned Type 9 gearbox. I had a bit of time on my hands so i got the grinder out and scrapped the mt75 transmision tunnel and buit the book spec type 9 tunnel. This meant that i had to modify the pedal box plate to widen it, but at least i will be able to drive with shoes on as the pedals will be a bit farther apart!
Sunday, 14 November 2010
Pedal box finished
I have now finished assemblingthe pedal box for the car, I purchaced the parts required from andy hugill at saturn sprotscars. I had to modify the box slightly to allow fitment as my transmission tunnel is quite wide, I am het to drill the hole for the master cylinder, but il do that when ive aquired one...


Front uprights
Front uprights have arrived, managed to get the last pair from rally design, phew! got a spare nearside aswell :)

Friday, 12 November 2010
Hi,
This blog will follow me as i build a haynes roadster, following the book "build your own sports car" by Chris Gibbs. The haynes roadster is a 7esque designed sportscar which uses running gear and parts from a ford sierra. Most builders tend to use a "donor" car for parts such as the engine, transmision and steering rack/column etc. However, i dont have the space for a donor car so im aquiring as many brand new parts as i can to allow me to gain a current registration number when the car is IVA tested. This will cost a bit more in the long run and take me longer to aquire the parts as funds allow. The overall cost of my finished roadster will be a fraction of the cost of, say a caterham or westfield. Infact the haynes roadster can be built for a fraction of the price of a small shopping car. Many builders have built pristine examples for less than £3000!
Before embarking on the build i had very little welding experience, although i am a bit of a self taught mechanic but by no means an expert. the book teaches most things you need to know, and the haynes forum is full of top blokes who have helped me out countless times. If broken down into manageble chunks the build really is simple.
My main aim is to break the build down into manageble chunks, first of all i intend on building the chassis and get it rollin on wheels, then engine and gearbox, followed by brakes, fuel supply and wiring then bodywork and interior. I started the chassis in september this year, my target is a rolling chassis by christmas...( maybe christmas 2020 :) )
I intend on using a 2.0 litre ford zetec engine coupled with a type nine gearbox, however i may find another engine while saving up so i have opted to build my chassis with a wider transmision tunnel incase the gearbox i end up with is larger than a type nine. This is at the cost of a little foot space but id rather modify the mounting brackets than have to modify the tranny tunnel later on!
Heres some pics of what i have done so far....
 Build day one, Had to got my girlfriends dad to help me build a table ( wood is not my forte!) The table has to be perfectly flat to build the chassis otherwise theres no point carrying on as the chassis wont be straight.

After checking and double checking that the table was perfectly level I then marked out the positions of the chasisis foundation rails. After cutting the rails ( i did them all myself but i dont want to ever have to do it again! theres alot of angles and compound angles to cut. I would highly reconmend getting a precut chassis rail kit from a top bloke called handyandy on the haynes forum) i layed them out and used blocks of wood to fix them in the correct positions then screwed them all tight down on the table to prevent movement. I then tack welded the foundation rails before begining on the dreaded front frame....


After a coulple of weeks of working on the chassis at weekends and after work i ended up at this stage, the chassis mainframe, still tacked together incase of any errors to be fully welded only when finished


After many hours of hard graft after work i finally got to the stage where the build started looking less like a climbing frame and more like a car...
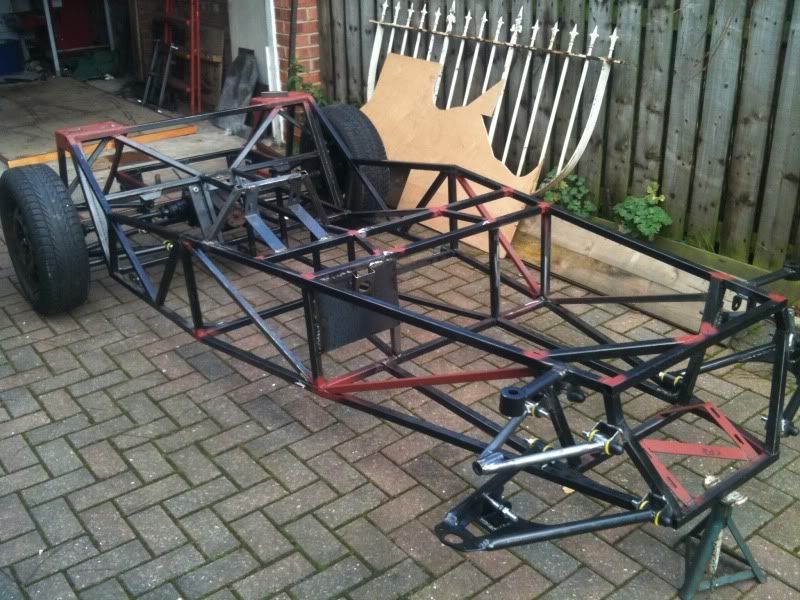
 I have now got the rear end of the chassis rolling minus brakes and coilovers, the front end will be completed within the next couple of weeks. All thats left to do to the chassis is to finish a couple of welds that iv missed, add the rear nearside downtube for the rear tub support, weld on the floor and the engine/gearbox mounts.
This blog will follow me as i build a haynes roadster, following the book "build your own sports car" by Chris Gibbs. The haynes roadster is a 7esque designed sportscar which uses running gear and parts from a ford sierra. Most builders tend to use a "donor" car for parts such as the engine, transmision and steering rack/column etc. However, i dont have the space for a donor car so im aquiring as many brand new parts as i can to allow me to gain a current registration number when the car is IVA tested. This will cost a bit more in the long run and take me longer to aquire the parts as funds allow. The overall cost of my finished roadster will be a fraction of the cost of, say a caterham or westfield. Infact the haynes roadster can be built for a fraction of the price of a small shopping car. Many builders have built pristine examples for less than £3000!
Before embarking on the build i had very little welding experience, although i am a bit of a self taught mechanic but by no means an expert. the book teaches most things you need to know, and the haynes forum is full of top blokes who have helped me out countless times. If broken down into manageble chunks the build really is simple.
My main aim is to break the build down into manageble chunks, first of all i intend on building the chassis and get it rollin on wheels, then engine and gearbox, followed by brakes, fuel supply and wiring then bodywork and interior. I started the chassis in september this year, my target is a rolling chassis by christmas...( maybe christmas 2020 :) )
I intend on using a 2.0 litre ford zetec engine coupled with a type nine gearbox, however i may find another engine while saving up so i have opted to build my chassis with a wider transmision tunnel incase the gearbox i end up with is larger than a type nine. This is at the cost of a little foot space but id rather modify the mounting brackets than have to modify the tranny tunnel later on!
Heres some pics of what i have done so far....
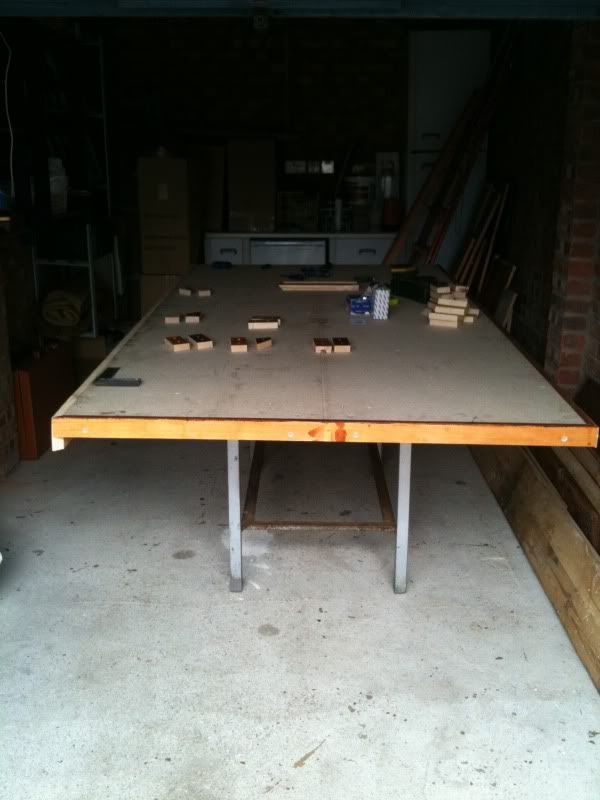
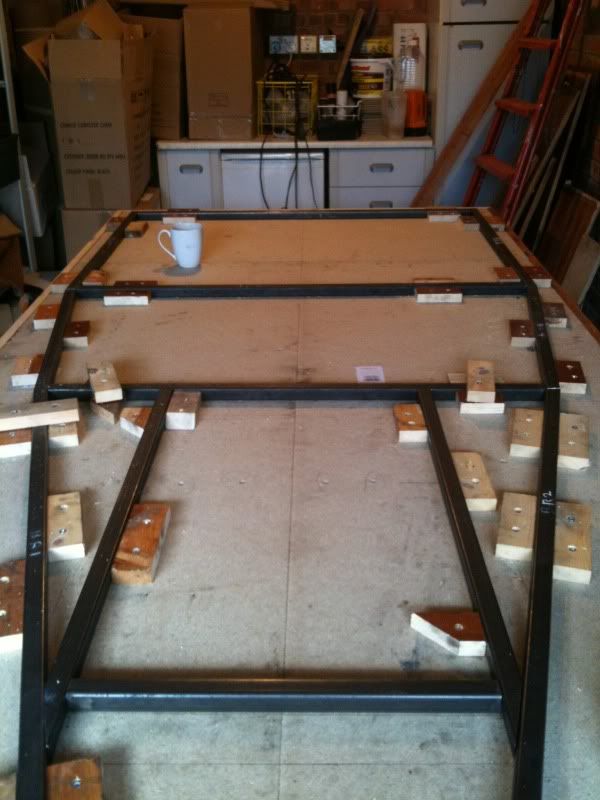
After checking and double checking that the table was perfectly level I then marked out the positions of the chasisis foundation rails. After cutting the rails ( i did them all myself but i dont want to ever have to do it again! theres alot of angles and compound angles to cut. I would highly reconmend getting a precut chassis rail kit from a top bloke called handyandy on the haynes forum) i layed them out and used blocks of wood to fix them in the correct positions then screwed them all tight down on the table to prevent movement. I then tack welded the foundation rails before begining on the dreaded front frame....
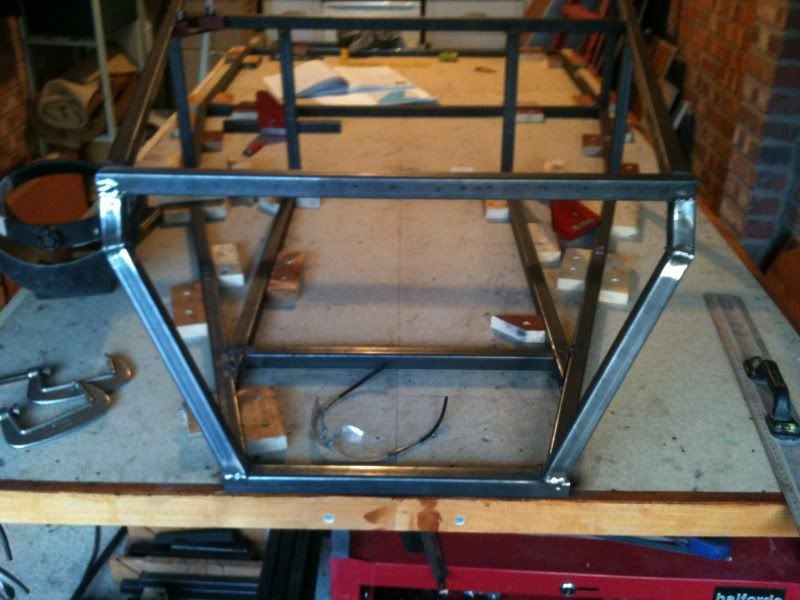
The front frame was my first encounter with compound mitre angles. The front frame has to be as acurate as the book states because it carries the front wishbone mounts and sets the height of the top chassis rails. I got it right on the first attempt, however i the upright parts are handed and i managed to cut three left handed uprights three times in a row :) the book throws the builder in at the deep end regarding mitre cuts, i nearly had a nervous breakdown at this stage! Then it was onto attaching the upright tubes and adding the top rails.
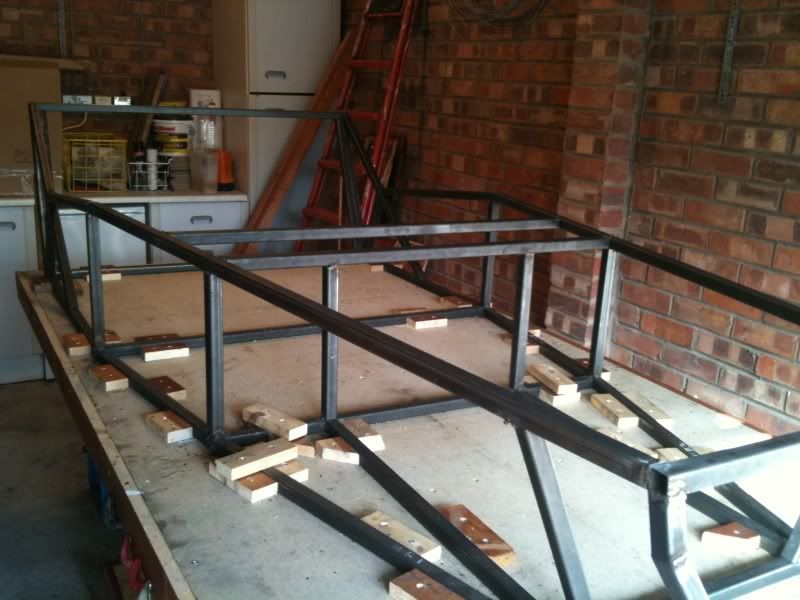
After a coulple of weeks of working on the chassis at weekends and after work i ended up at this stage, the chassis mainframe, still tacked together incase of any errors to be fully welded only when finished
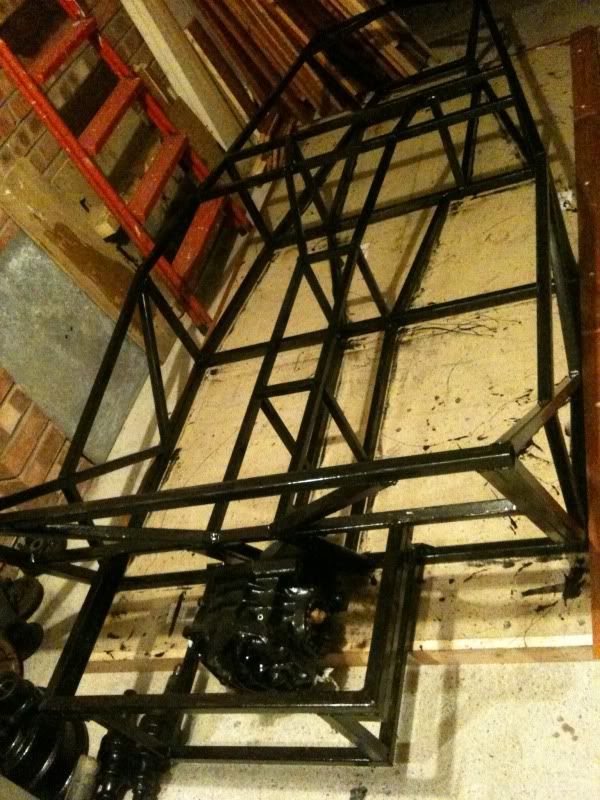
After several weeks of late nights i had the chassis up to this stage, note the diff is just sat in its intended position. My workshop is a bit damp, so i decided to give the chassis a quick coat of hammerite to prevent it rust from forming, ill rub it back and give it a proper paint job once fully finished.
Once the chassis was more or less completed i had a trip up to hartlepool to meet Andy Hugill at Saturn Sports Cars, and ordered the wishbones from him, aswell as other components. His fabrication is spot on as is his advice and stomer care, he did scare me witless though when we went for a drive in his roadster! I hope to return the favour when mines finished ;)
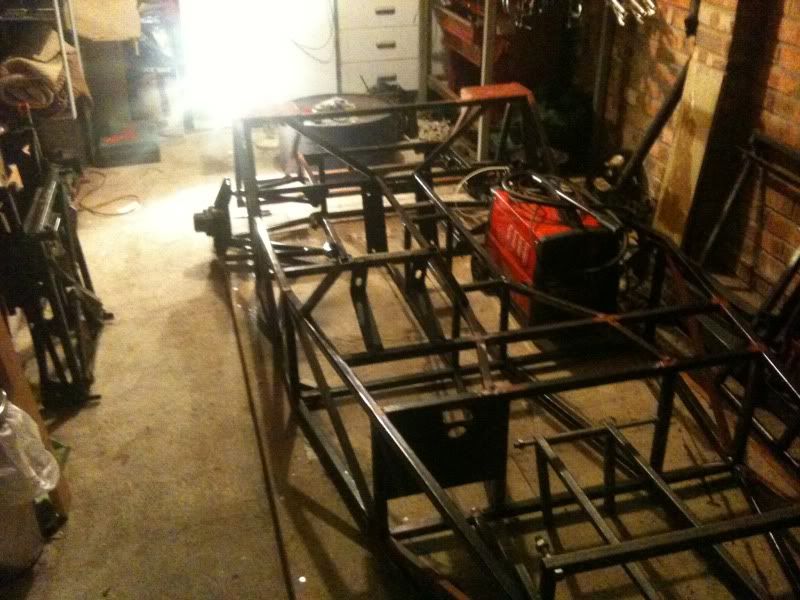
After many hours of hard graft after work i finally got to the stage where the build started looking less like a climbing frame and more like a car...
Subscribe to:
Posts (Atom)